Managing Webhooks in Quartzy
_For questions, please reach out to support@quartzy.com _
Overview
What are Webhooks and their uses?
Webhooks can be used to build integrations between Quartzy and another software tool used in your lab.
- These integrations are outbound in nature – which means that they help you share information from Quartzy to this other software tool.
- These integrations will help you save cost and increase efficiency by automating tasks in a lab thereby cutting down on manual work and reducing human errors.
Examples of such outbound integration use cases include:
- Communication and Task management
- Keep track of your Quartzy order status updates in Slack/Microsoft Teams
- Create a task in Asana or a reminder in Google calendar and prepare ahead for upcoming deliveries
- Reporting/Analytics
- Automatically keep track of your monthly spend on Quartzy orders in Google Sheets and save time otherwise spent copying-pasting information from Quartzy
- Inventory Management
- Sync information about Quarzty inventory items to your favorite database tools such as Airtable, Notion, Google Sheets, etc.
How do Webhooks work?
Webhooks allow you to receive events as HTTP POST requests to a server when events occur in Quartzy. These events can be used to design these outbound integration use cases described in the previous section.
See this Wikipedia article for more information on the basics of a webhook. To learn more about best practices around Quartzy’s Webhooks, please read this introductory article in our developer documentation.
The upcoming sections will go into more detail about how to:
- Access webhook configurations
- Create a new webhook configuration
- Modify an existing webhook configuration
- Enable or Disable an existing webhook configuration
Access webhook configurations
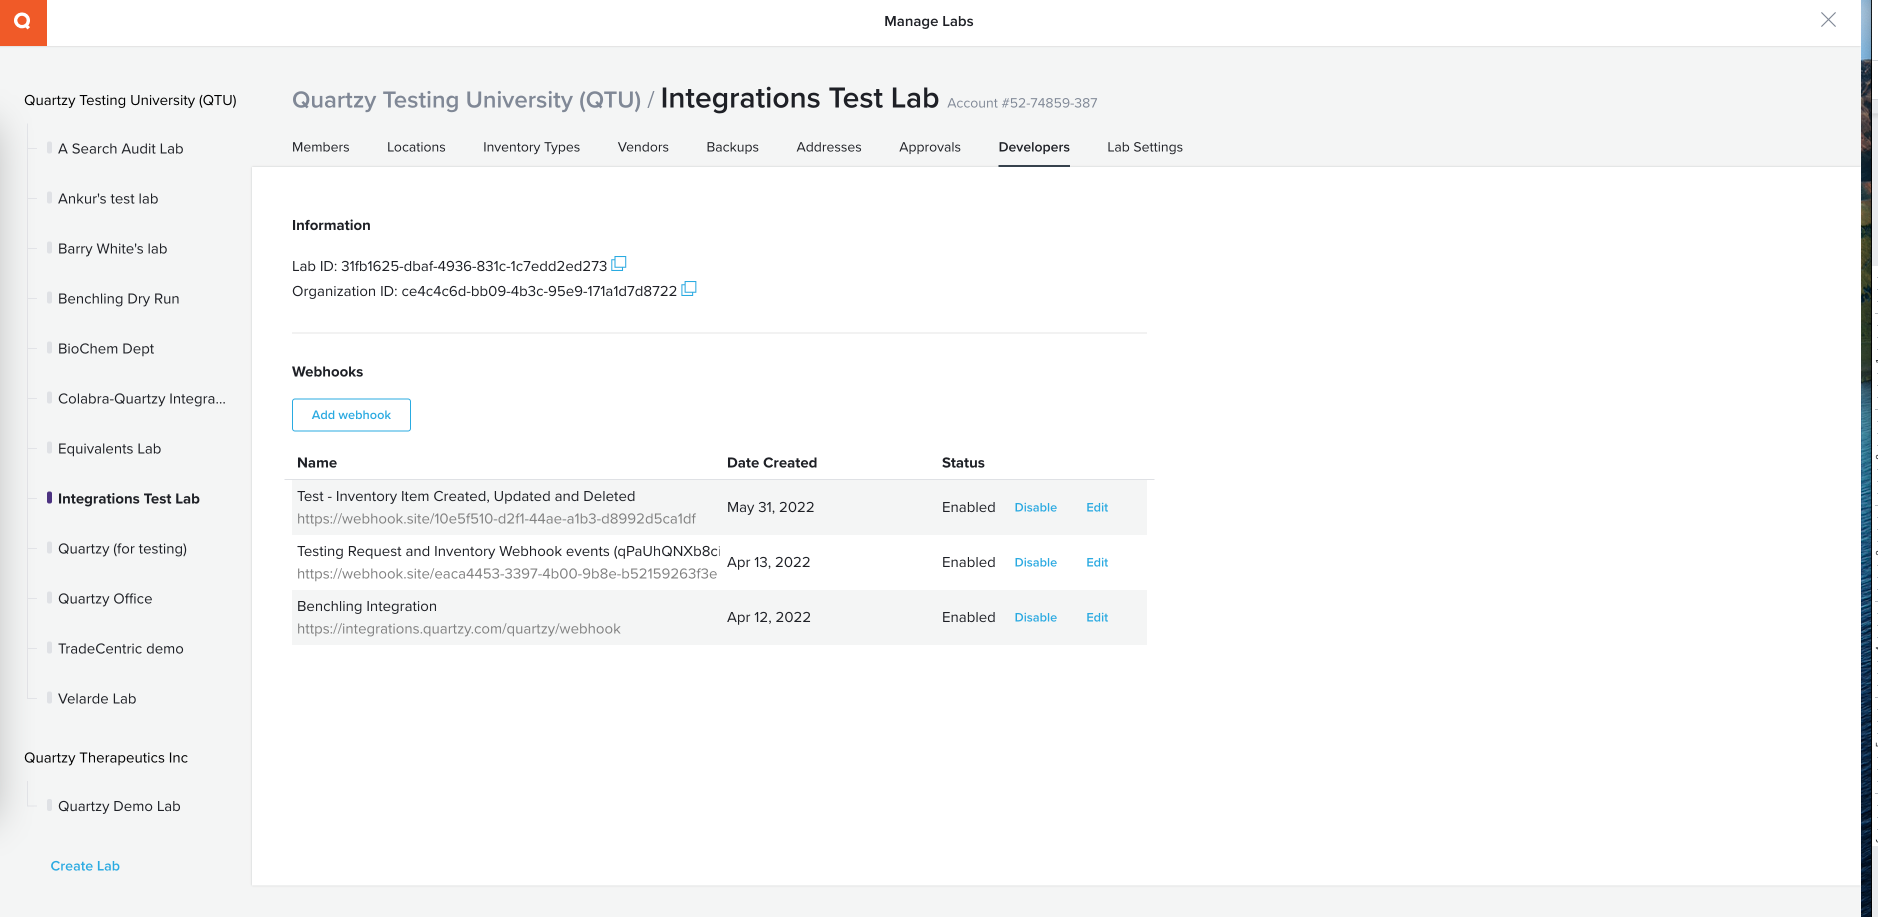
To access existing webhook configurations or create a new configuration, navigate to your Lab Settings in Quartzy and click on the tab named Developer. Here is an example below:
Create a new webhook configuration
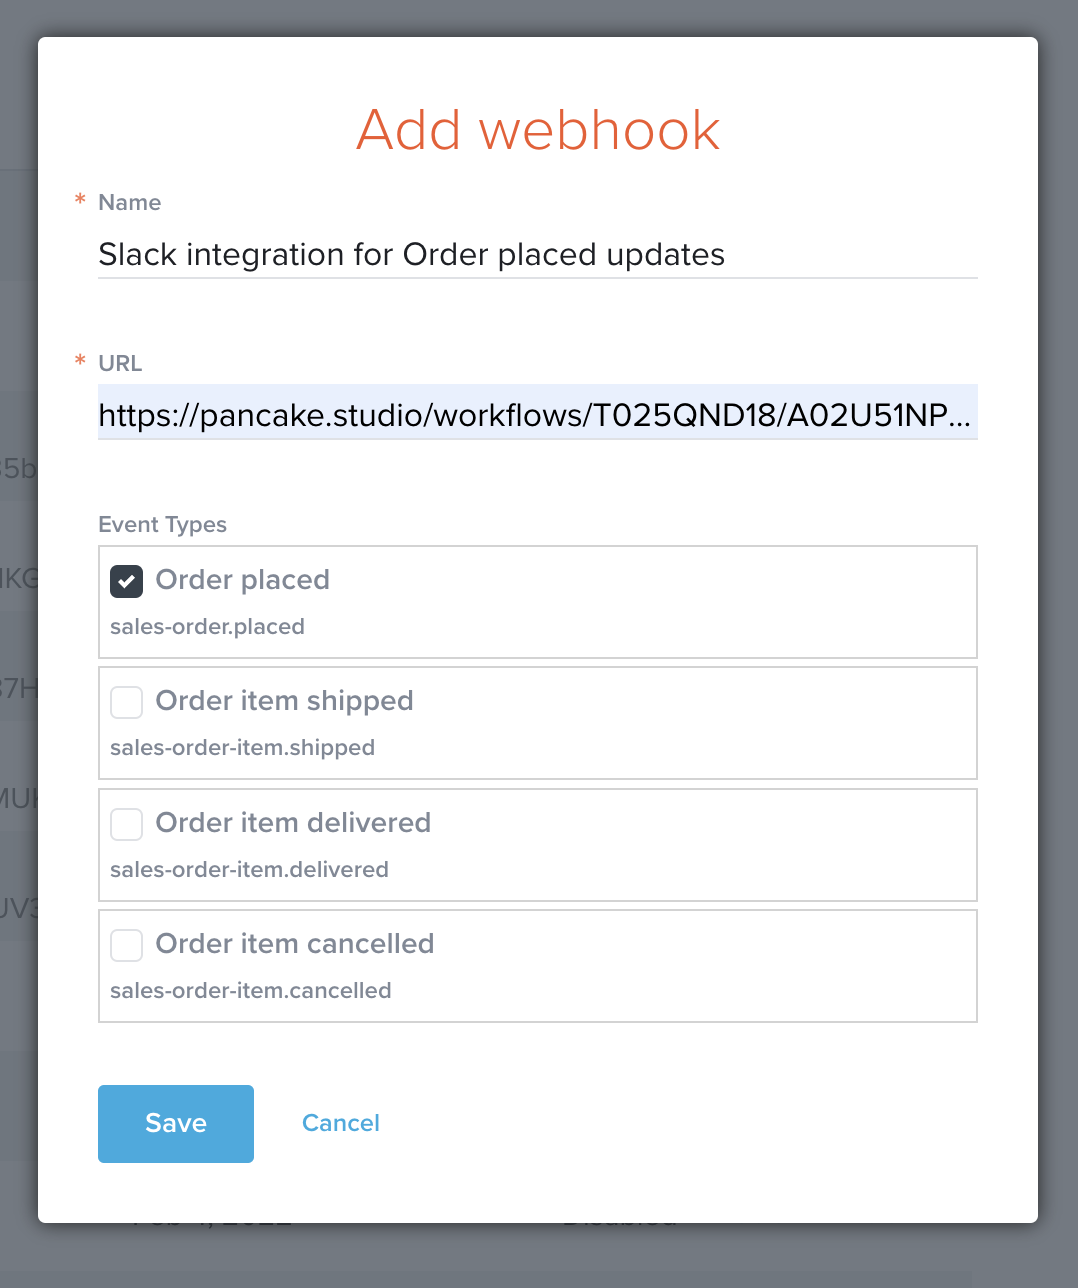
- To create a new webhook configuration, click the Add webhook button.
- In the new modal called **Add webhook, **enter the three mandatory fields
- Name: The display name of your webhook configuration
- URL: The URL that would receive the webhook
- Event Types: The event(s) occurring in Quartzy for which you want to receive webhooks
- Click Save
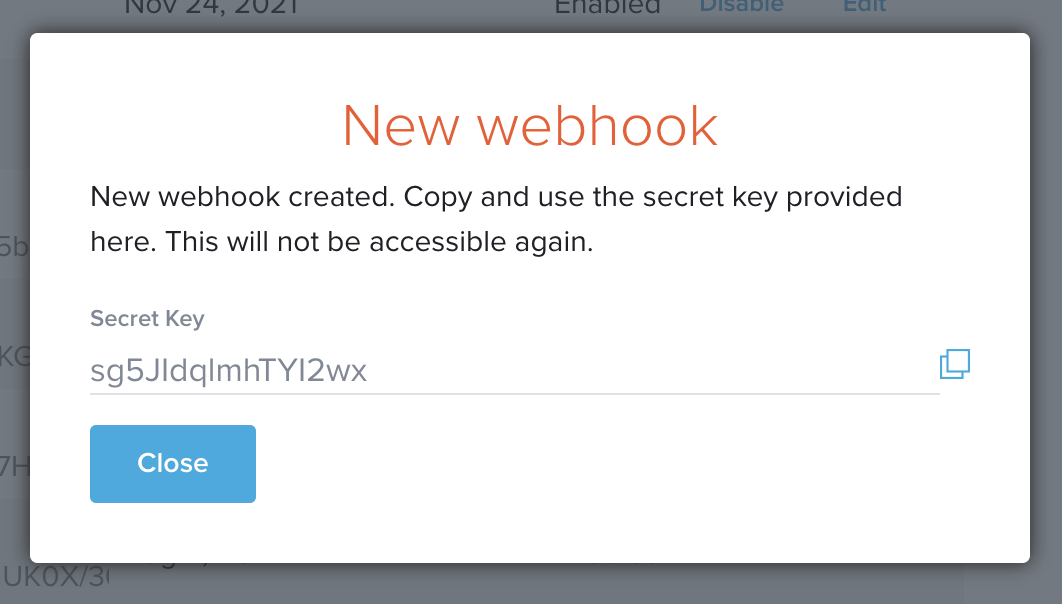
- In the new modal called New webhook, you will notice a field displaying the Secret Key. Click the copy icon to copy this secret key to a safe location. Click Close after you are done copying the secret key.
Modify an existing webhook configuration
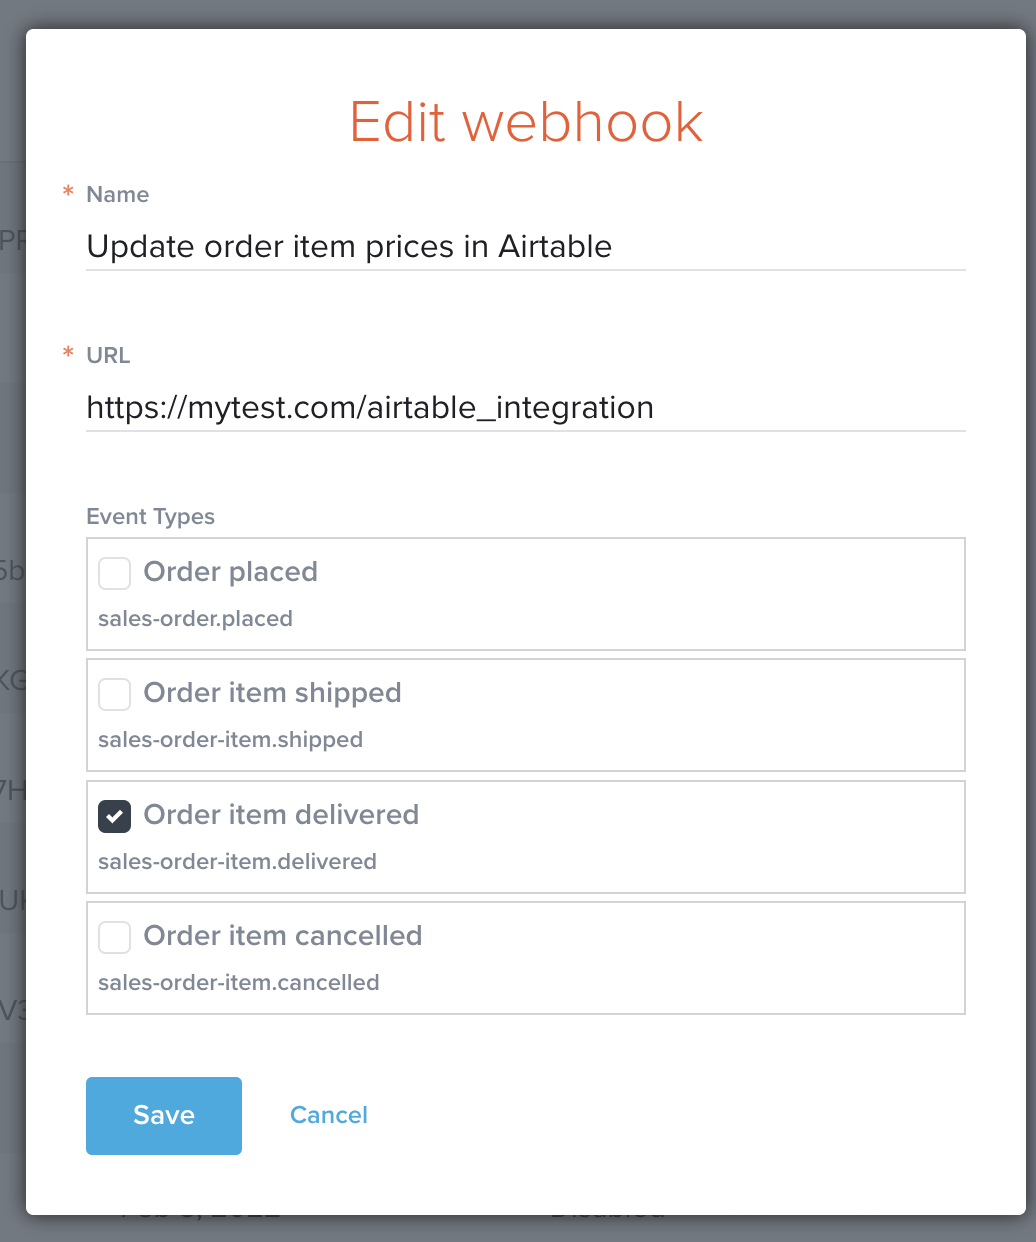
- To modify an existing webhook configuration, click the Edit link next to the webhook name in the table displaying all your webhook configurations.
- In the new modal called **Edit webhook, **update the fields of interest.
- Once you are done editing, click Save.
Enable or Disable an existing webhook configuration
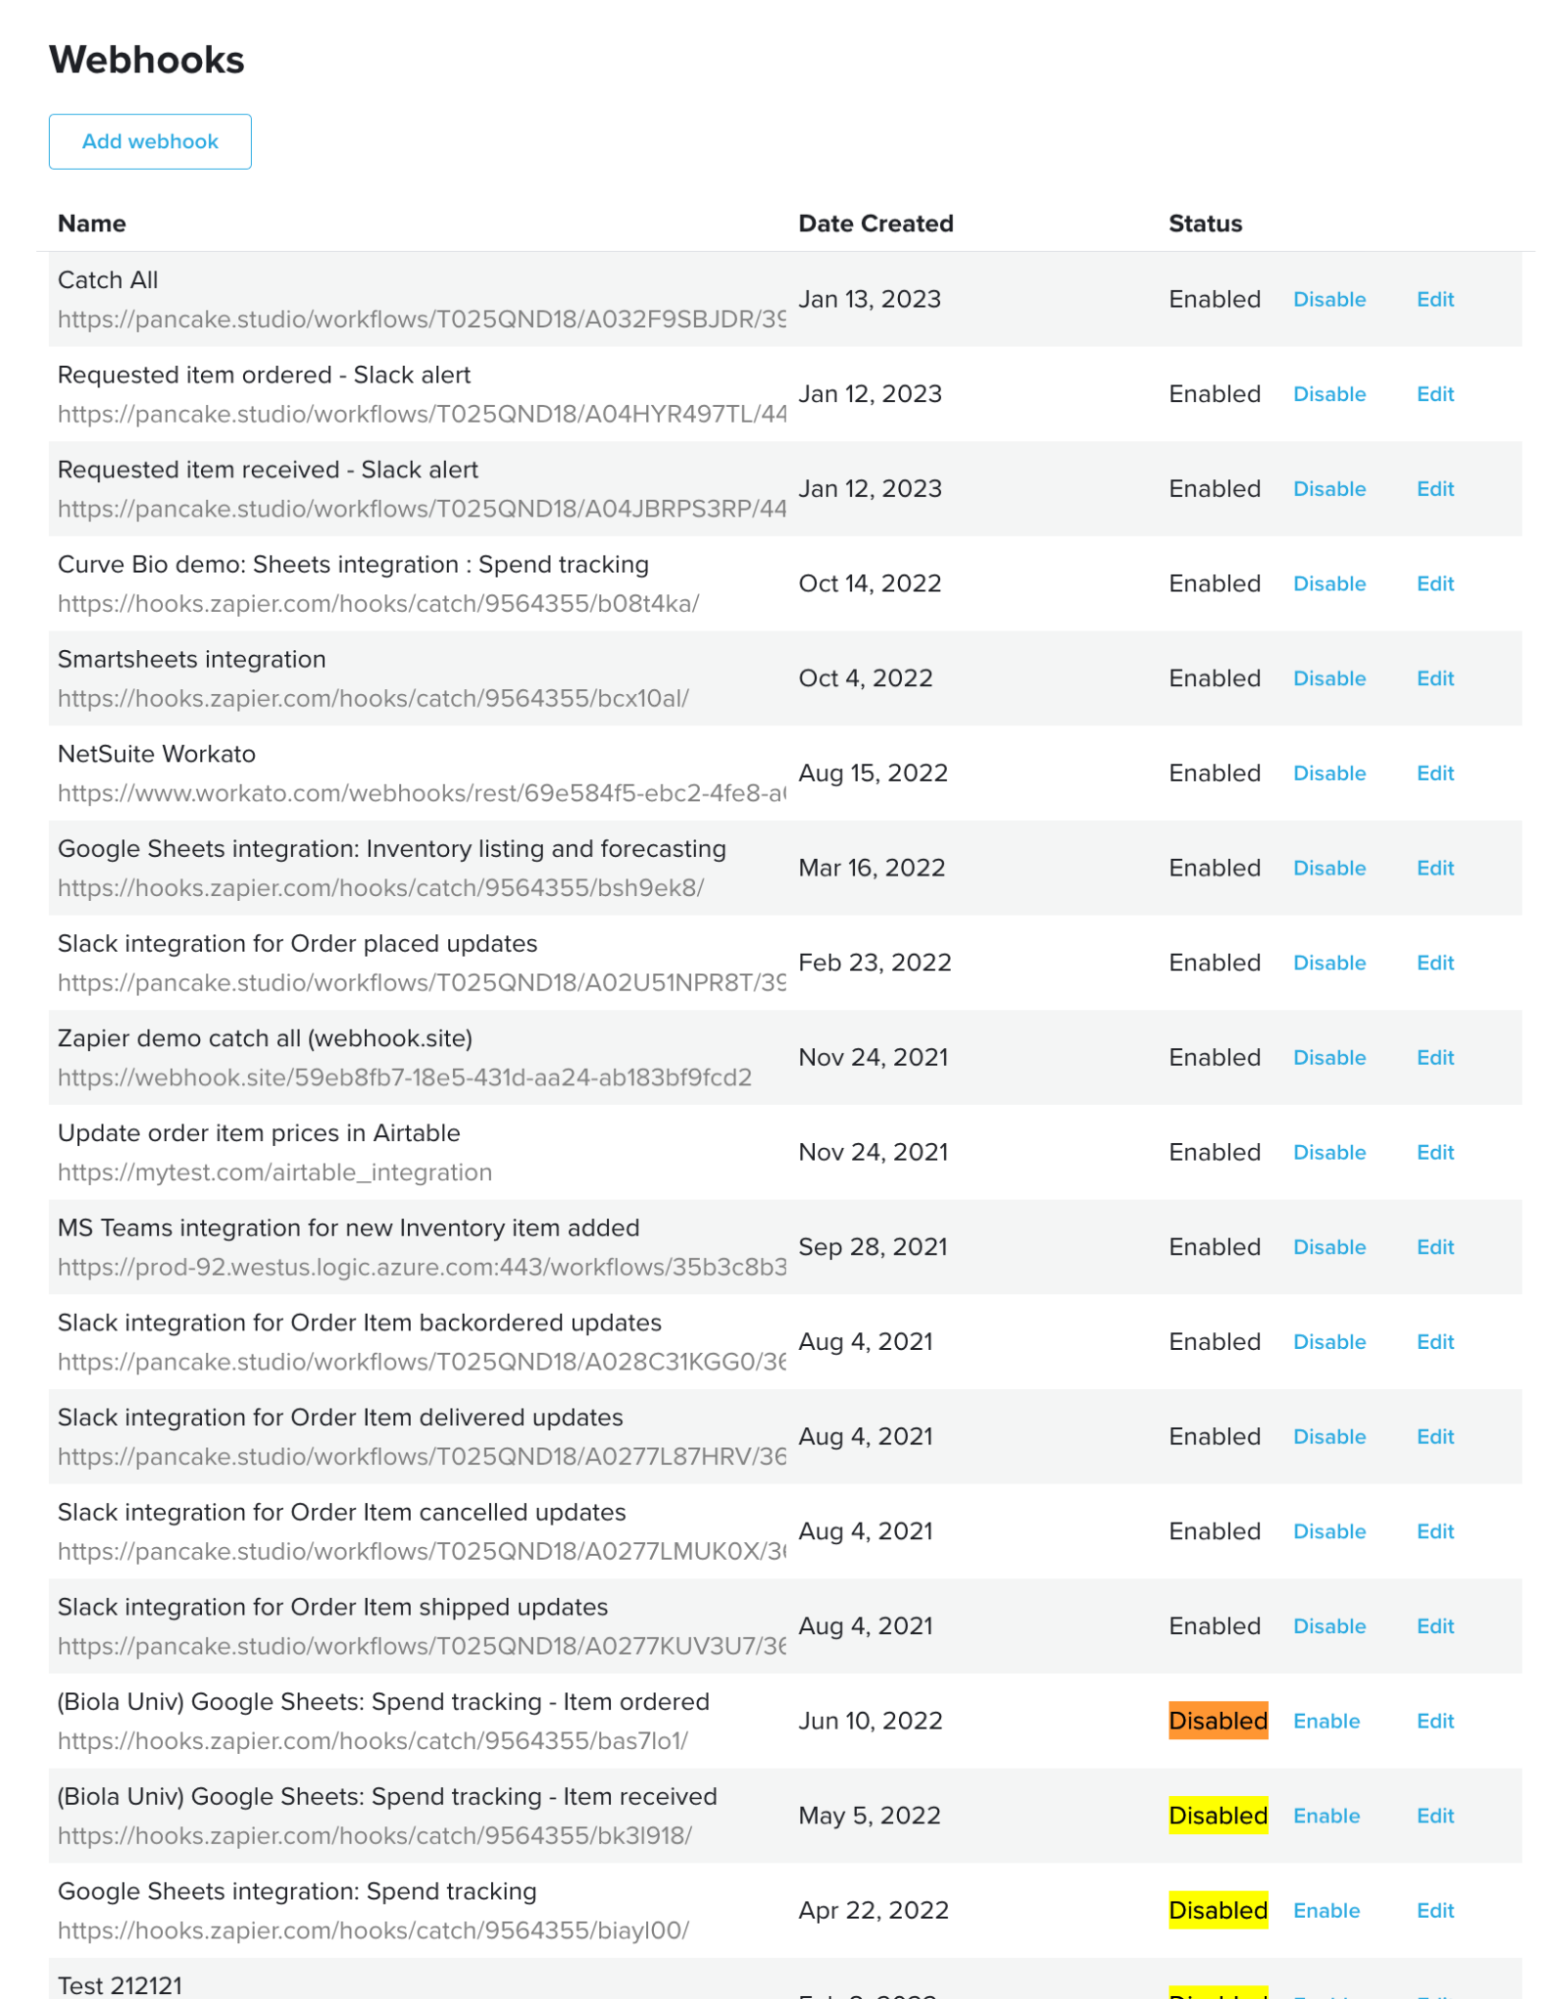
- To enable or disable an existing webhook configuration, click the Enable or Disable link next to the webhook name in the table displaying all your webhook configurations.
- Once you are done, you would notice the latest status of your webhook configuration in the Status column. You would also notice that on refreshing the page, the disabled webhook configurations appear at the bottom of the table as shown in the example below.
